Community Source Development Kit 12 (CSDK12) is the community set of tools made by merging together files from the CS2 Workshop Tools and fixes made by the community members for the Deadlock’s 6 Heroes (Aug 19) update.
Reduced CSDK 12 is a stripped down version of the full CSDK 12 (without full game files). It can be used for editing models, sounds, textures, UI, vdata and more.
Installation
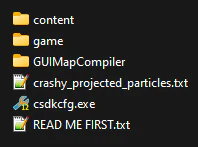
Download and open the archive.
Inside the archive is the Reduced_ folder. Unpack it where you want it to be and open it.
Launch csdkcfg.exe to load into the Configuration Tool. See the Usage section down below for instructions on how to use it.
Full Game Files
This step is required to be able to launch the game in bin_
Warning
Do not touch the Deadlock files from Steam during this.
- Download Depot Downloader. Make sure you own Deadlock on Steam.
- With Depot Downloader, download these manifests through the command prompt using the following commands:
DepotDownloader -app 1422450 -depot 1422451 -manifest 2639812037154209539 -qr -dir "C:\path\to\Reduced_CSDK_ 12"
DepotDownloader -app 1422450 -depot 1422456 -manifest 6378769520310560496 -qr -dir "C:\path\to\Reduced_CSDK_ 12"
Replace the path after -dir with the path to the root directory of Reduced CSDK 12.
-
Open
Reduced_withCSDK_ 12/game/citadel/pak01_ dir.vpk  Source 2 Viewer.
 -
In
Source 2 Viewer, right click on pak01_, select “Export as is” and export it todir.vpk Reduced_.CSDK_ 12/game/citadel 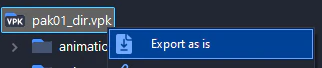
-
After all files have been exported, delete
pak01_and alldir.vpk pak01_files from###.vpk Reduced_andCSDK_ 12/game/citadel Reduced_.CSDK_ 12/game/core -
Open the
Reduced_archive that you downloaded, and re-extract it intoCSDK_ 12.zip Reduced_. When prompted, select “Replace the files in the destination”. This is a necessary step.CSDK_ 12 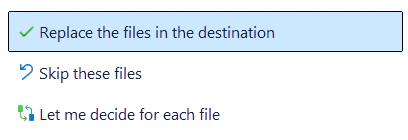
Usage
Launch the CSDK Configuration Tool (launcher) by opening Reduced_.
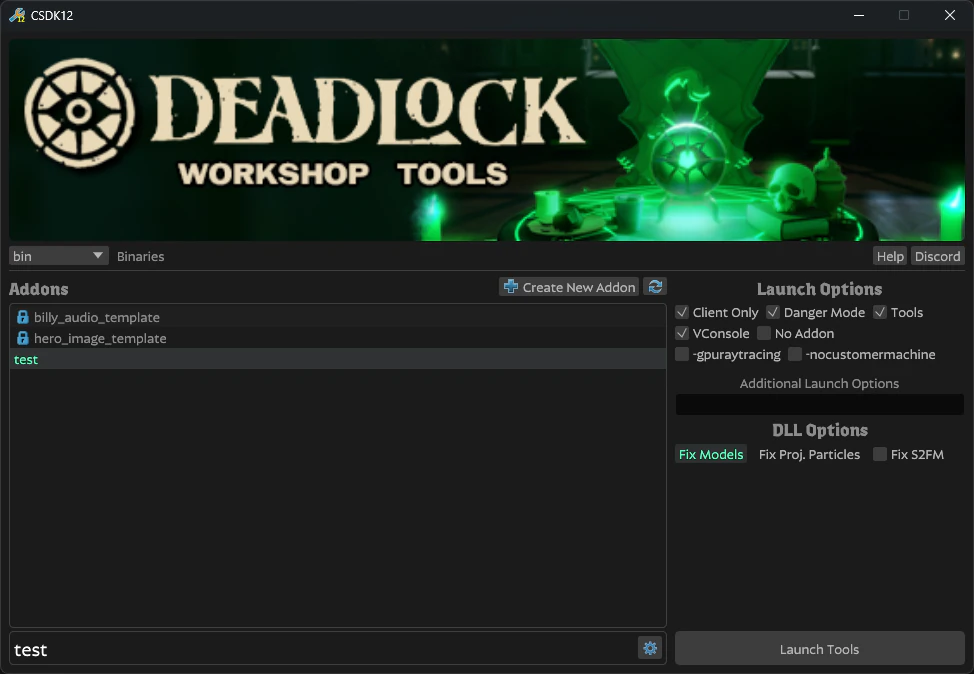
Press the “Launch Tools” button in the bottom right corner to launch the  Asset Browser for the currently selected addon.
Important
Steam must be running when launching the tools.
Addons
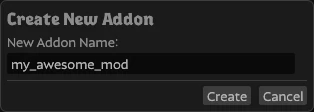
On the left side of the launcher is the “Addons” section. You can think of addons as projects, it’s recommended to create a separate addon for every mod that you make. To create an addon press the “Create New Addon” button and give it a name.
Addon names must be all lowercase with no spaces.
Warning
If you have addons with uppercase letters, spaces, or special characters in their name they won’t show up in this launcher. You need to rename your addon folders in
content/citadel_andaddons game/citadel_and press the “Refresh addons list” button to use them in the new launcher.addons
Creating an addon automatically makes two folders for your project:
content/citadel_: This is where you’ll place all raw source files, so they can be used by the tools. It is the main folder you’ll be working in.addons/<your_ addon_ name> game/citadel_: This is where the compiled versions of your assets will be stored and read by the game. Tools should automatically compile new files if they are present inaddons/<your_ addon_ name> content/and be placed by the game in thegame/directory. Some files like localization files might be the exception. Compiled files usually end in_(e.g.,c .vtex_,c .vmdl_,c .vdata_).c
Right clicking on an addon in the list or pressing the gear icon next to the currently selected addon at the bottom will bring up the context menu:
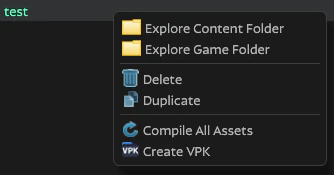
From here you can:
- Explore Content Folder: open the
content/citadel_folder for this addon.addons/ - Explore Game Folder: open the
game/citadel_folder for this addon.addons/ - Delete: delete both Content and Game folders of this addon.
- Duplicate: make a copy of this addon. This is how you make template addons into regular (editable and launchable) addons.
- Compile All Assets: use the Resource Compiler to compile all assets in the Content folder of this addon without launching the tools.
- Create VPK: create a
.vpkfile from the compiled Game folder of this addon.
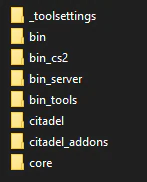
Binaries
CSDK12 ships with four sets of binaries: bin, bin_ (only for the Lighting Compiler), bin_ and bin_.
You can select which set of binaries to use for launching the tools in the top-left corner of the launcher:

bin
Regular tool binaries. This mode is able to compile Animgraph1 files, but crashes on previewing some projected particles.
bin_
Requires Full Game Files. Allows you to launch Deadlock in server mode with limited tools like Asset Browser, Material Editor and the ability to compile some files like VData and Panorama assets. Everything else will crash. Useful for previewing your mods.
bin_
Other set of tools binaries. This mode doesn’t crash on previewing projected particles, but crashes on compiling Animgraph1 files.
bin_
Used by GUIMapCompiler shipping with CSDK 12 to compile maps without tools open.
Launch Options
On the right side of the configuration tool are “Launch Options”.
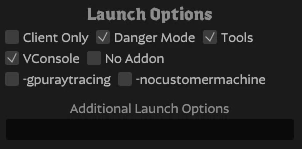
VConsole: Whether to use the VConsole or the in-game console window.
No Addon: This launches the tools with no addon mounted. Should be only used to edit some specific tool assets like toolscenelightrigs.vdata and game_.
Warning
For regular mod-making behavior, it’s advised to create a new addon or duplicate an existing addon. Continuing in “No Addon” might lead to original
game/citadelassets being overridden, potential corruption of important data and the addon approach works together with the CS2 Workshop Manager to pack the addons in a VPK, plus it’s much easier and cleaner to organize packs of assets in addons.
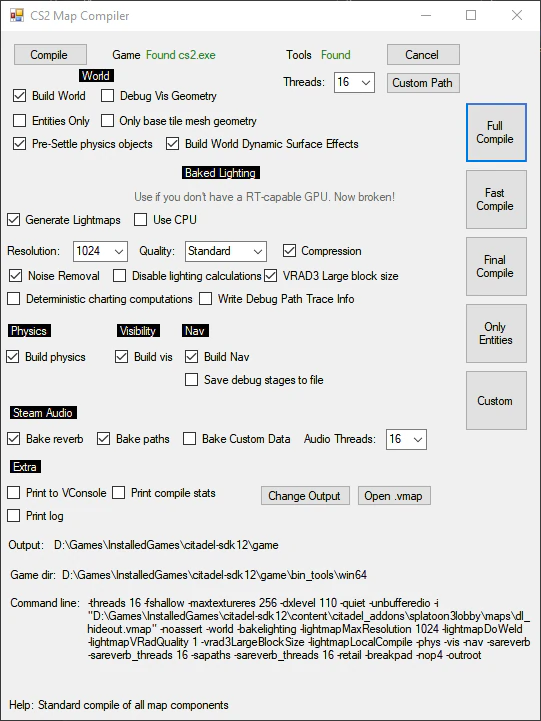
Lighting Compiler
Launch Reduced_ to use the GUI Map Compiler. Requires bin_ binaries to be present. This tool is needed in order to compile maps with lighting.